How to Build a Simple Paper-Towel Germination Station at Home
You do not need a propagation dome, a heat mat, or any gear with a brand name to germinate seeds well. The paper-towel method has stuck around for decades because it works, it is cheap, and you can build the whole setup from things already in your kitchen. The trick is in the details, so here is how to put together a proper germination station at home, for adults growing where it is legal.
The thing nobody tells you when you start is that the towel itself does almost nothing. What you are really building is a small, controlled climate: a warm, dark, evenly moist pocket of air that mimics being buried a centimetre under soil, but with a window you can peek through. Get that climate right and the seed does the rest on its own.
What you will need
Gather these before you start. Nothing here should cost much, and most of it you already own.
- Two sheets of plain paper towel, unscented and undyed
- Two clean plates, or a plate and a shallow bowl that can sit on top as a lid
- A small amount of filtered or dechlorinated water
- A clean, sealable food container or zip bag (optional, but handy)
- A warm, dark spot to park it
- Your seeds and a pair of tweezers
That is the entire shopping list. If your tap water is heavily chlorinated, fill a glass and let it sit out overnight so the chlorine off-gasses, or just use filtered water. Avoid kitchen roll that is heavily textured or printed with patterns; the dyes and embossing serve no purpose here and the loose fibres can wrap around a fine taproot.
Note. Skip the popular add-ons you will see online. Soaking in hydrogen peroxide, dosing the water with nutrients, or adding a "germination booster" all add risk without adding much. Plain water and warmth out-germinate the chemistry set almost every time, something we get into in our piece on why you don't need hydrogen peroxide to germinate seeds.
Step 1: Dampen the towels properly
Wet one paper towel thoroughly, then wring it out until it is moist but not dripping. This is the step people get wrong, and it is worth slowing down for. A soggy towel pools water around the seed and starves it of oxygen, which causes more failed germinations than almost anything else. A seed breathes while it sprouts; drown it and it rots before the taproot ever shows.
Aim for the dampness of a wrung-out cloth, not a wet one. A useful test: hold the folded towel up and squeeze gently in your fist. If a drop or two of water beads at the bottom, it is too wet. If it feels cool and clings to itself but releases nothing, that is the target.
Step 2: Lay out the seeds
Place the damp towel flat on one plate. Set your seeds on it with a couple of centimetres between each so the emerging taproots do not tangle or grow into one another. Fold or lay the second damp towel over the top so the seeds are sandwiched between two moist layers.
If you are starting several strains at once, this is the moment to keep track of which is which. Crowding everything into one corner to save space backfires the day three of them pop and you cannot tell them apart. Either run separate plates or lay them out in clearly spaced rows and jot a quick map on a scrap of paper.
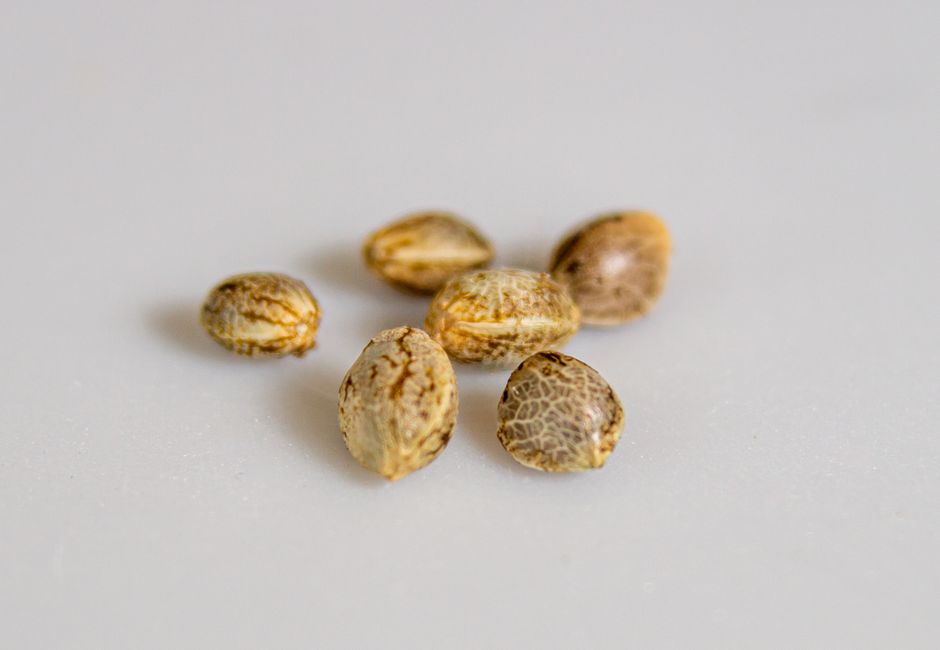 Even spacing keeps the taproots from tangling once they emerge.
Step 3: Make it a dark dome
Cover the plate with the second plate flipped upside down, or slide the whole thing into a food container with the lid resting on. You want a sealed-ish, dark chamber that holds humidity without going airtight. A little air exchange is good; the seeds still need to breathe. The darkness keeps conditions stable and slows evaporation, and it is what the seed expects, since underground it never sees light until the shell breaks the surface.
A zip bag works just as well as a container and takes up less room. Seal it most of the way but leave a finger's width open at one corner so air can still creep in and out. The point is a pocket of still, humid, dark air, not a vacuum.
Step 4: Find the warm spot
Warmth is the engine of germination. Aim for roughly 21–26 °C. Below about 18 °C everything slows to a crawl and rot starts to win the race; much above 28 °C and you risk cooking the embryo or drying the towels out before the seed has a chance. Within that band, steadier is better than warmer.
Good spots in a normal home: the top of a fridge, where the compressor throws off a gentle, constant warmth; a high shelf in a heated room, since warm air pools near the ceiling; or near the back of a router or set-top box that runs slightly warm. Keep it away from cold windowsills and well off radiators, ovens, or anything that runs genuinely hot. If you are unsure, a cheap aquarium or room thermometer tucked next to the station for a day will tell you more than guessing ever will.
| Temperature | What happens |
|---|---|
| Below 18 °C | Sluggish, uneven, rot risk climbs |
| 21–26 °C | The sweet spot: fast, even, reliable |
| Above 28 °C | Towels dry out fast; embryos can cook |
Step 5: Check once a day
Lift the lid once a day to look and to re-moisten if a towel is drying at the edges. Mist or dribble a little water as needed, then re-cover. Resist the urge to poke the seeds or lift them to inspect the underside. Most cannabis seeds crack and show a small white taproot within two to five days, though older or tougher seeds can take a week or more, so do not write one off early.
Once a day is the right rhythm. Checking every hour does nothing but cool and dry the chamber each time you open it, and every extra handling is another chance to bump a fragile root. If you are the fidgety type, set the station somewhere you cannot see it constantly.
A seed that takes six days is not a failed seed. It is a slow one. The seeds growers lose are almost always the ones they fussed over, not the ones they left alone.
Step 6: Move them when ready
When a taproot reaches about the length of the seed itself, it is time to plant. Wait much longer and the root keeps growing, gets brittle, and starts fusing to the towel, which makes a clean lift far harder. Catch it at roughly seed-length and the move is easy.
Handle the seed by its shell, never the root, and use the tweezers if your fingers feel clumsy. Make a shallow hole about a centimetre deep in moist, light soil, set the seed taproot pointing down, and cover gently without packing it. Keep the surface lightly damp and warm, and the shell should push up within a few days. From here the seedling's needs shift from moisture to stable, humid air, which is exactly the gap a DIY humidity dome is built to fill.
When a seed sticks: quick troubleshooting
A few common snags and what they usually mean:
- Nothing has cracked after a week. Check your warmth first; cold is the usual culprit. If the temperature is right and the seeds are old, age may simply have caught up with them. Storage matters more than people think, which is why we wrote about storing seeds for the long haul.
- A seed cracked but the root looks brown or mushy. That is rot, and it almost always traces back to a towel that was too wet. Dial the moisture back to wrung-out, not soaked.
- The towel keeps drying out fast. Your spot runs too warm or too breezy. Move it somewhere steadier and seal the chamber a touch more.
- The shell stays clamped on the seedling after planting. Mist it; the softened shell usually slips off on its own. Picking at it risks tearing the first leaves, so only help if it is still stuck after a day or two.
Why this simple station works
There is nothing magic in the paper towel. What it gives you is control and a clear view. You can see exactly when each seed has popped, the moisture stays even between checks, and the dark, warm chamber mimics being buried in soil. That visibility is the real advantage over sowing straight into a pot and waiting blind, where a seed can quietly rot or sit dormant for a week while you wonder whether to dig it up.
Build it once, get a feel for the moisture and the warmth in your particular kitchen, and you will reach for this setup every season. It costs next to nothing, it is repeatable, and once the small details are second nature it is honestly hard to beat. If you want the same fundamentals laid out as a broader method rather than a build, our guide on how to germinate cannabis seeds covers the same ground from a different angle.